

Views:
Views visualize the data associated with your project. A 3D view shows the three-dimensional model. It provides several modes to visualize additional information about simulation settings, such as boundary conditions, mesh properties and results. A schematic view presents a two-dimensional model by visualizing the logical connections of sub-models. Plot views display 1D result data. The parameter view displays the combination of all parameters together with the available results. Finally, a macro view is an editor window where a macro for automation of tasks or simply for input can be dealt with.
Ribbon:
Ribbon is a collections of toolbars organized in tabs. Some of these tabs are contextual and appear only when a certain type of object is selected, providing context specific tools i.e. when viewing results. The File tab, also known as the backstage view, is a special view which offers a lot of commands from the traditional File menu and much more.

Ribbons can be customized in the options dialog.
Control Bars:
A control bar can be docked or a floating window. It can wrap a wide variety of controls, such as navigation trees to perform a selection, drag 'n' drop lists to add elements to your project, list boxes to perform additional input, or simple output windows.
Status Bar:
The status bar is available at the bottom of the application. Here you can see useful settings of your project i.e. Units, Background material, Number of mesh cells, etc, and a toolbar to help you work with the view.

Quick Access Toolbar:
On the top left corner of the application window, you will see a toolbar, which as the name suggests, offers quick access to certain commands.
Quick access toolbar can be customized in the options dialog.
Context Menu:
The context menu is a very flexible method to access frequently used menu commands for the current context. A context menu is opened by pressing the right mouse button over the control, item or view that it is associated with.
It is possible to tile your views the way you like, simple drag the view and place it where you like. Alternatively, you can use the predefined tiling layouts by accessing the context menu of the tabs at the bottom.

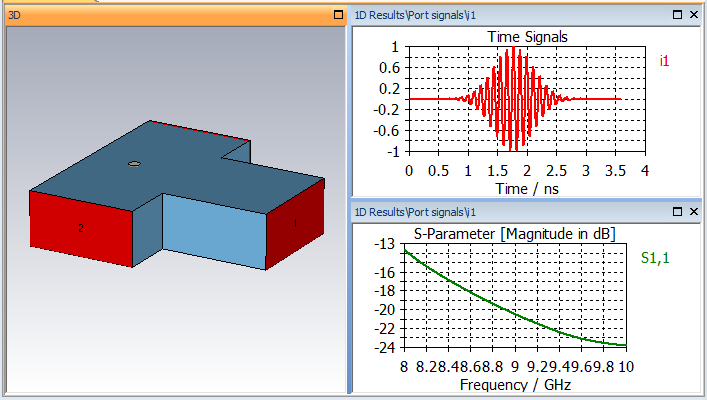
Tile Three:
Shows three windows in the main view. On the left side will be the 3D view of your project and on the right side will be two 1D result views.
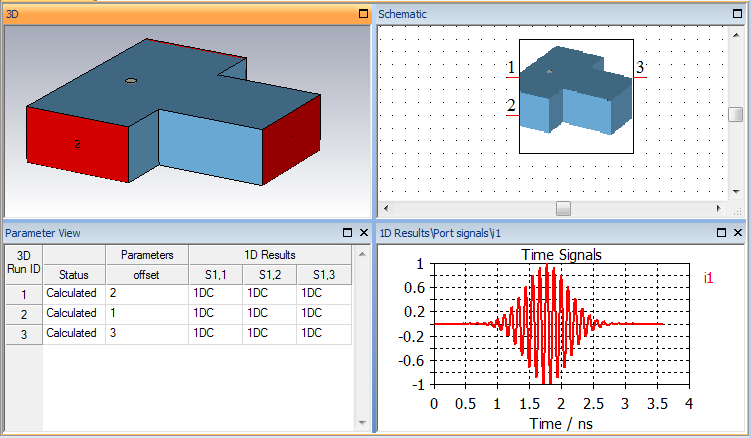
Tile Four:
Shows four windows in the main view. On the left side will be the 3D view and Schematic view of your project. On the right side there will be two 1D result views.
